Quickstart
Install the BrowserStack AI Evals SDK and send your first trace in under 5 minutes.
Quickstart
This guide walks you from a blank project to logging your first trace. The whole thing takes about 5 minutes.
Prerequisites
- A BrowserStack account with AI Evals access. Sign In/Log in to your AI Evals Dashboard
- What you can do and which projects you see depend on your role and team — see Members & Roles.
- Your credentials are available under Settings > Project Settings > API Keys in the BrowserStack dashboard.
- You need both the public key (username) and the secret key (access key).
- Node.js 18+, Python 3.9+, or Java 11+ depending on your language
Admin Access Required: Only users with admin roles have access to API keys in the dashboard.
Step 1: Install the SDK
npm install @browserstack/ai-sdk
# or
pnpm add @browserstack/ai-sdk
# or
yarn add @browserstack/ai-sdk
pip install https://static.testops.ai/sdk/python/browserstack_ai_sdk-1.0.0a31.tar.gzMaven:
<dependency>
  <groupId>com.browserstack</groupId>
  <artifactId>browserstack-ai-sdk-java</artifactId>
  <version>1.0.0</version>
</dependency>
Gradle:
implementation 'com.browserstack:browserstack-ai-sdk-java:1.0.0'Step 2: Set Your Credentials
Set your keys as environment variables. Never hardcode credentials in source code.
export AISDK_PUBLIC_KEY=your_public_key
export AISDK_SECRET_KEY=your_secret_key
Or add them to a .env file (and add .env to .gitignore):
AISDK_PUBLIC_KEY=your_public_key
AISDK_SECRET_KEY=your_secret_key
IMPORTANT LLM Key Storage: To run Dataset Runs or Experiment Runs on the platform (Remote Evaluation), you must store your provider API keys (OpenAI, Anthropic, etc.) in the LLM Connections section of the dashboard. Admin access required.
Step 3: Initialize the Client
import { AISDK } from '@browserstack/ai-sdk';

const testOps = new AISDK({
  publicKey: process.env.AISDK_PUBLIC_KEY,
  secretKey: process.env.AISDK_SECRET_KEY,
});
from browserstack_ai_sdk import AISDK
import os
test_ops = AISDK(
public_key=os.environ["AISDK_PUBLIC_KEY"],
secret_key=os.environ["AISDK_SECRET_KEY"],
)import com.browserstack.TestOps;
// Initialize from environment variables (reads AISDK_PUBLIC_KEY / AISDK_SECRET_KEY)
TestOps testOps = TestOps.fromEnv();
// Or provide credentials explicitly
TestOps testOps = new TestOps.Builder()
.publicKey(System.getenv("AISDK_PUBLIC_KEY"))
.secretKey(System.getenv("AISDK_SECRET_KEY"))
.build();Step 4: Send Your First Trace
Auto-tracing
With auto-instrumentation enabled, all LLM calls are captured automatically. Here's a complete working example:
  import { Observe } from '@browserstack/ai-sdk';

  await Observe.init({
      publicKey: process.env.AISDK_PUBLIC_KEY,
      secretKey: process.env.AISDK_SECRET_KEY,
  });

  import OpenAI from 'openai';

  const openai = new OpenAI();
  const response = await openai.chat.completions.create({
      model: 'gpt-4o',
      messages: [
        { role: 'system', content: 'You are a helpful assistant.' },
        { role: 'user', content: 'What are three benefits of writing unit tests?' },
      ],
  });

  console.log(response.choices[0].message.content);
from browserstack_ai_sdk import Observe
import os
Observe.init(
public_key=os.environ["AISDK_PUBLIC_KEY"],
secret_key=os.environ["AISDK_SECRET_KEY"],
) # must be first
import openai
client = openai.OpenAI(api_key=os.environ["OPENAI_API_KEY"])
response = client.chat.completions.create(
model="gpt-4o",
messages=[
{"role": "system", "content": "You are a helpful assistant."},
{"role": "user", "content": "What are three benefits of writing unit tests?"},
],
)
print(response.choices[0].message.content)import com.browserstack.TestOps;
import com.openai.client.OpenAIClient;
import com.openai.client.okhttp.OpenAIOkHttpClient;
import com.openai.models.ChatCompletion;
import com.openai.models.ChatCompletionCreateParams;
import com.openai.models.ChatCompletionMessageParam;
public class QuickstartExample {
public static void main(String[] args) {
// Initialize TestOps — auto-instruments the OpenAI client via ByteBuddy
TestOps testOps = TestOps.fromEnv();
OpenAIClient openai = OpenAIOkHttpClient.fromEnv();
ChatCompletionCreateParams params = ChatCompletionCreateParams.builder()
.model("gpt-4o")
.addMessage(ChatCompletionMessageParam.ofSystem(
"You are a helpful assistant."))
.addMessage(ChatCompletionMessageParam.ofUser(
"What are three benefits of writing unit tests?"))
.build();
ChatCompletion completion = openai.chat().completions().create(params);
System.out.println(completion.choices().get(0).message().content());
}
}Run your code. The SDK captures the LLM call and sends the trace to BrowserStack AI Evals in the background.
- Observe.init() must be called before importing provider SDKs (OpenAI, Anthropic, etc.). It patches these libraries at import time — if you import them first, auto-tracing won't work.
- Traces are sent asynchronously and typically appear in the dashboard within a few seconds.
Manual Tracing
For specialized use cases where you need fine-grained control, custom spans, or to group observations into specific traces, use the AISDK client.
import { AISDK } from '@browserstack/ai-sdk';

  const client = new AISDK({
      publicKey: process.env.AISDK_PUBLIC_KEY,
      secretKey: process.env.AISDK_SECRET_KEY,
});

  // Create a trace
  const trace = client.trace({ name: 'onboarding-flow' });

  // Record a custom span
  const span = trace.span({
    name: 'user-data-processing',
    input: { userId: 123 },
  });

  // ... your logic ...

  span.end({
    output: { status: 'success' },
  });

  // Flush data before exit
  await client.flushAsync();
from browserstack_ai_sdk import AISDK
client = AISDK()
# Create a manual trace for a business workflow
trace = client.trace(name="onboarding-flow")
# Record a custom span
span = trace.start_span(
name="user-data-processing",
input={"user_id": 123}
)
# ... your logic ...
span.end()
# Flush data before exit
client.flush()import com.browserstack.TestOps;
import com.openai.client.OpenAIClient;
import com.openai.client.okhttp.OpenAIOkHttpClient;
import com.openai.models.ChatCompletion;
import com.openai.models.ChatCompletionCreateParams;
import com.openai.models.ChatCompletionMessageParam;
public class QuickstartExample {
public static void main(String[] args) {
// Initialize TestOps — auto-instruments the OpenAI client via ByteBuddy
TestOps testOps = TestOps.fromEnv();
OpenAIClient openai = OpenAIOkHttpClient.fromEnv();
ChatCompletionCreateParams params = ChatCompletionCreateParams.builder()
.model("gpt-4o")
.addMessage(ChatCompletionMessageParam.ofSystem(
"You are a helpful assistant."))
.addMessage(ChatCompletionMessageParam.ofUser(
"What are three benefits of writing unit tests?"))
.build();
ChatCompletion completion = openai.chat().completions().create(params);
System.out.println(completion.choices().get(0).message().content());
}
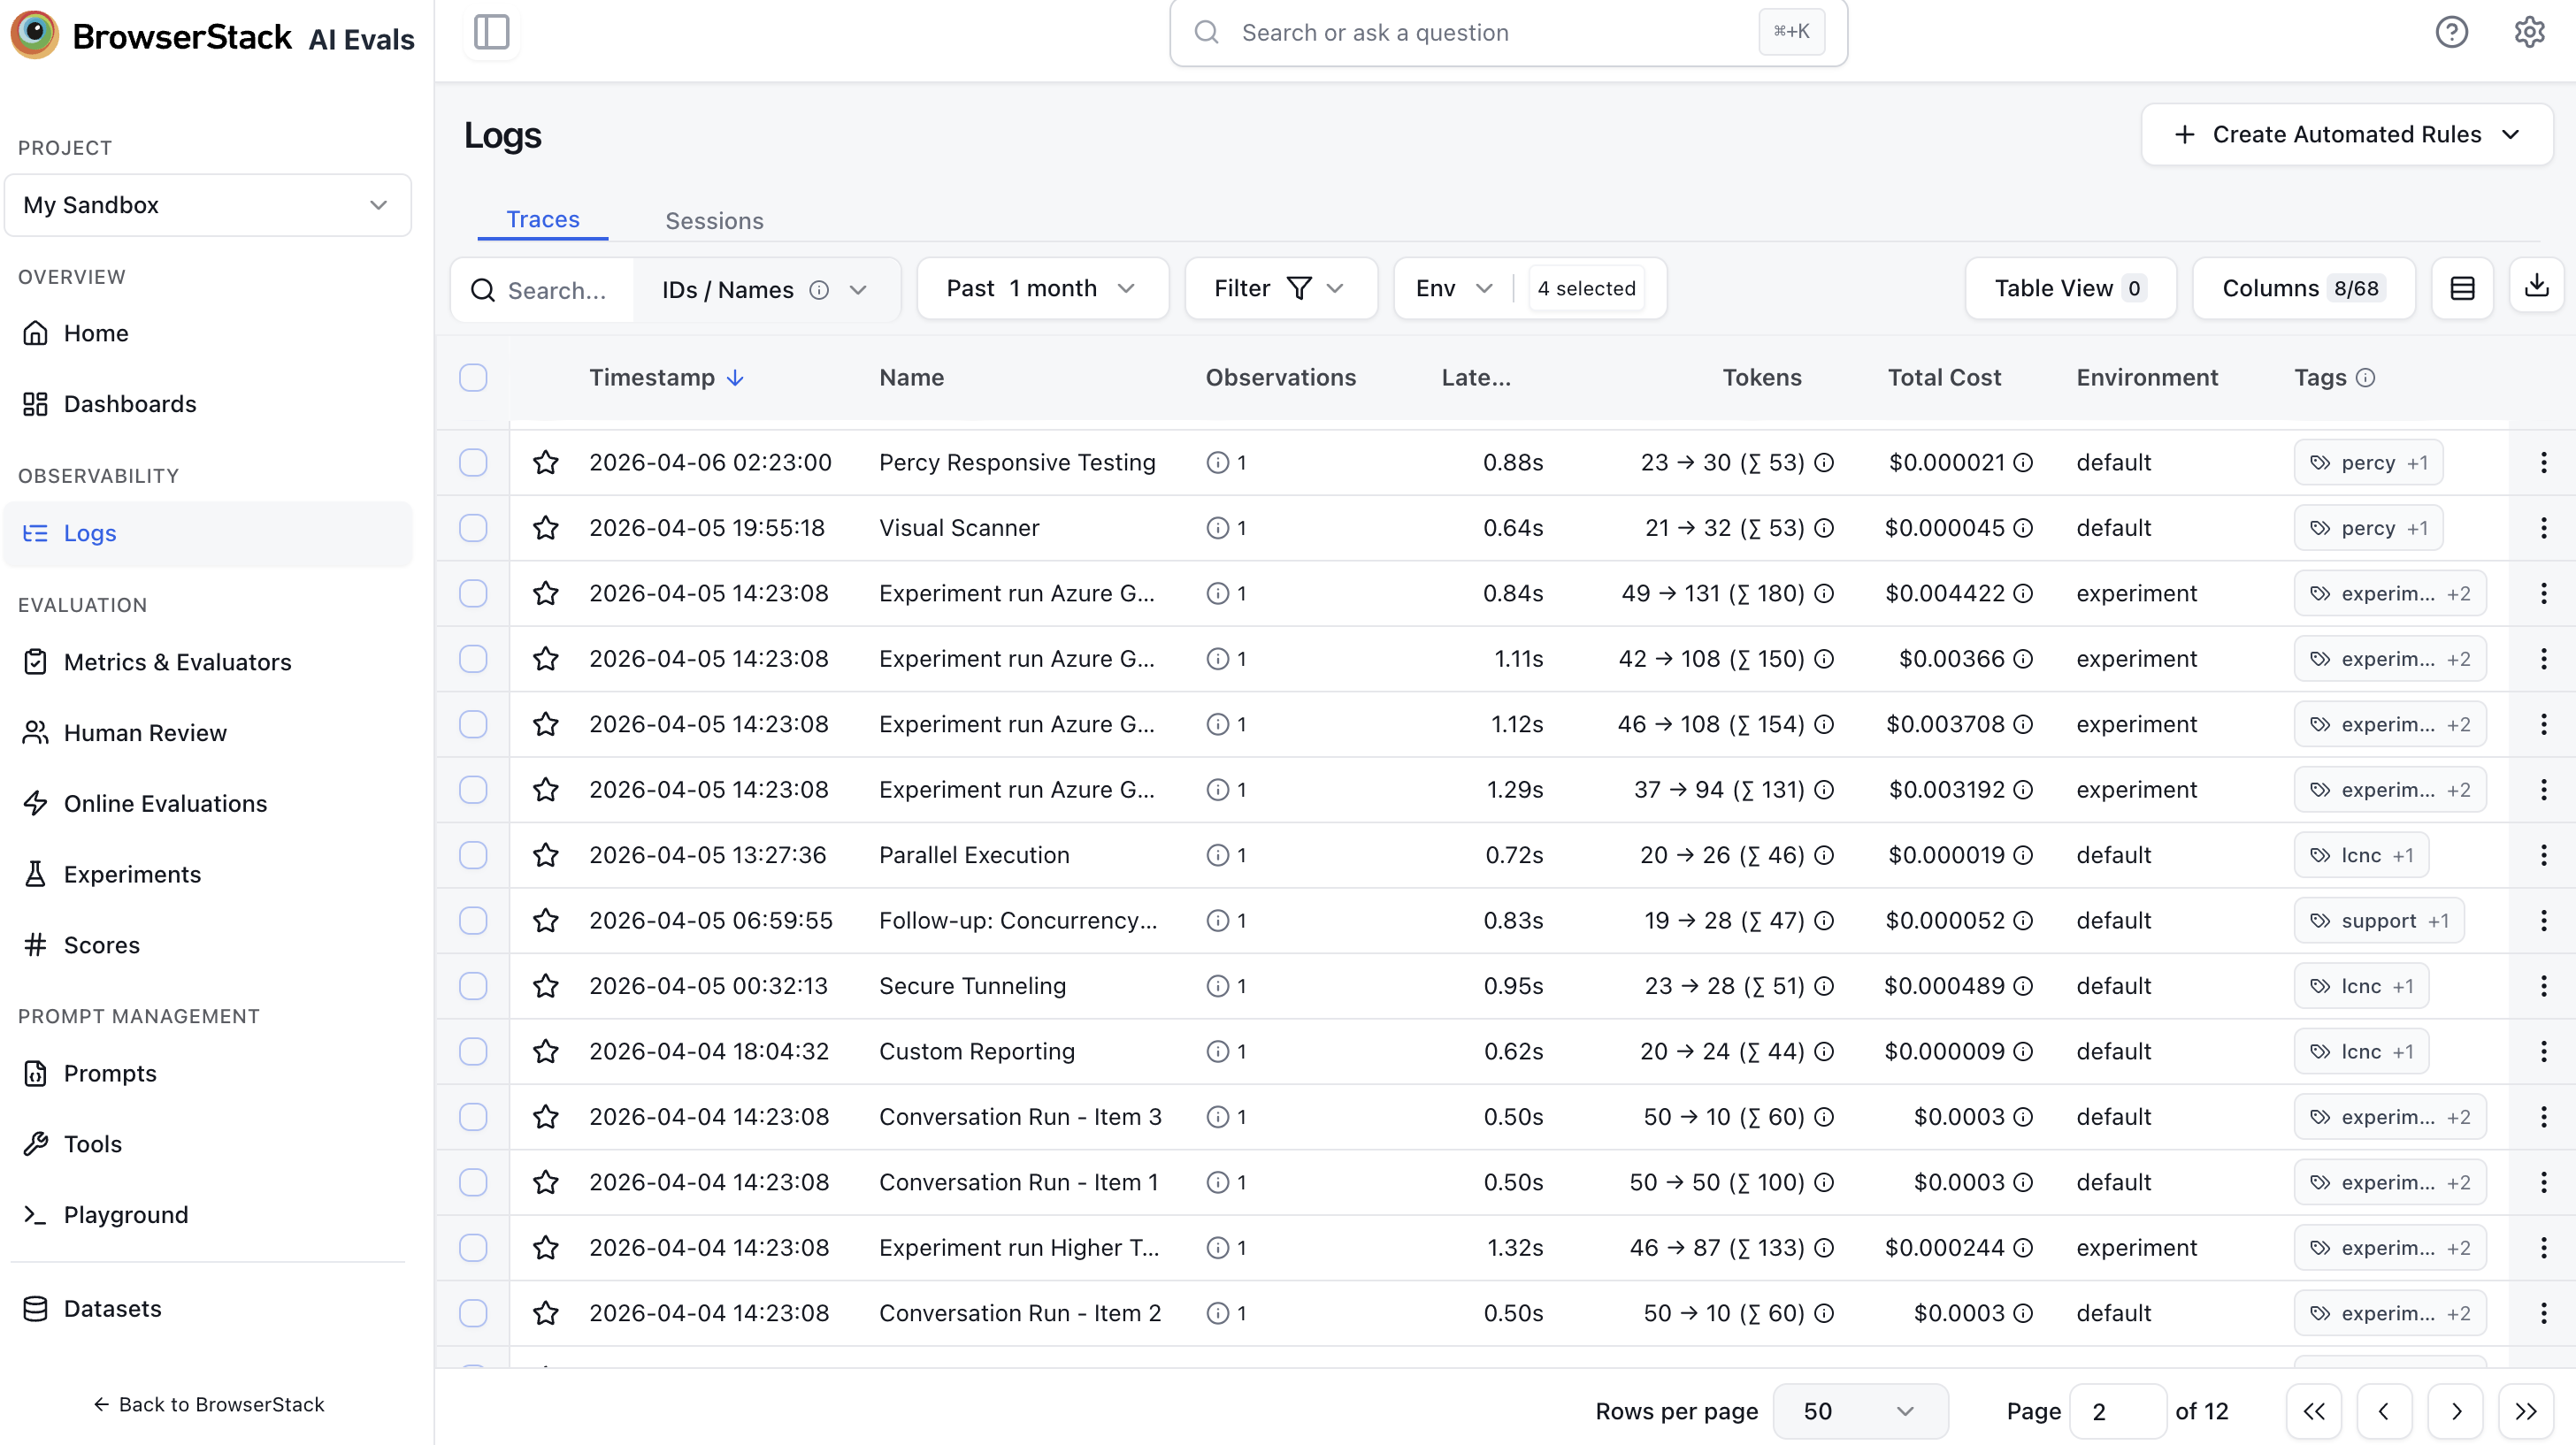
}Step 5: View the Trace in the Dashboard
- Open the BrowserStack AI Evals dashboard
- Navigate to Logs in the left sidebar
- You should see your trace listed with:
- The model name and request timestamp
- Input and output messages
- Token usage (prompt tokens, completion tokens, total)
- Latency in milliseconds
- Estimated cost
Click the trace to expand it and see the full observation tree, and any metadata.